|
|
|
|
News The Project Technology RoboSpatium Contribute Subject index Download Responses Games Gadgets Contact <<< CNC 3018Pro Mostics Aufero Laser 1 >>> Ortur Laser Master 2 ProThe Video about the Laser Master 2 Pro from OrturYou can buy the LaserMaster 2 Pro in the online shop of Ortur. That's where you can also get the metal enclosure box. Available laser modules: Module LU2-4SF Module LU2-4LF Assembly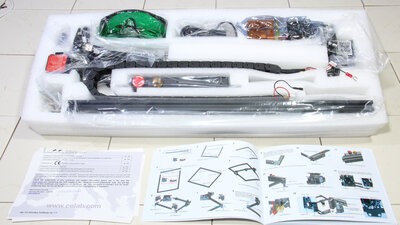
The device is delivered as a largely preassembled kit and all parts are shipped in a well-padded transport box. A printed assembly instruction is included, the electronic version is available as download. 
Building the mechanics was done quickly, as all core components ship preassembled. There are many high resolution photos of the device available as download package (64MB), which can help to eliminate remaining questions during the assembly. Basically, all that has to be done is to assemble the frame that is composed of 20x20mm extruded aluminum... 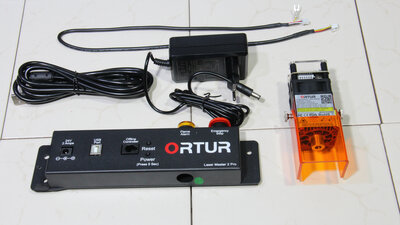
...and to do the wiring of the electronic components, which is also done quickly thanks to reverse polarity protected plugs. 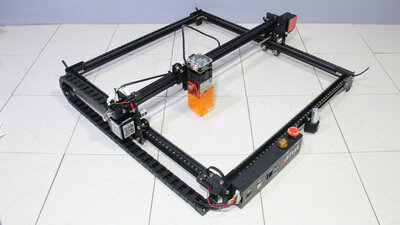
Both axes are guided by plastic rollers with ball-bearings, that can be adjusted via eccentric nuts. If everything is set up and adjusted correctly, you get a really sturdy mechanics that is largely free from backlash - I am impressed by the simplicity of the construction! The work area of the engraver is 40x40cm. 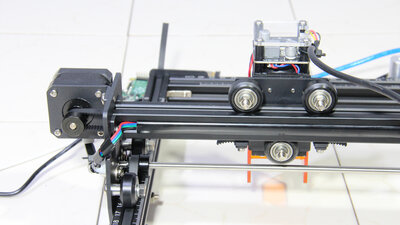
One stepper motor moves the laser along the X axis via a timing belt... 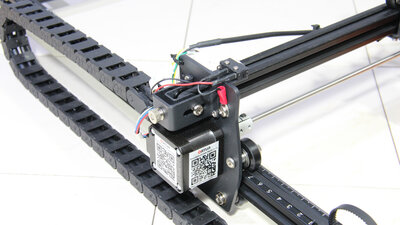
...and a second stepper motor is used for the movement along the Y-axis. 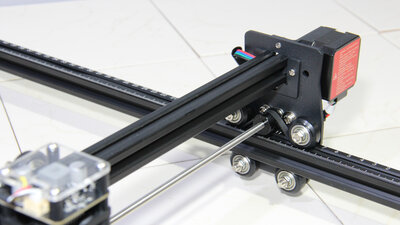
This is driven on two sides via timing belts, a long round rod connects the two pulleys so that no third stepper motor is required. Extras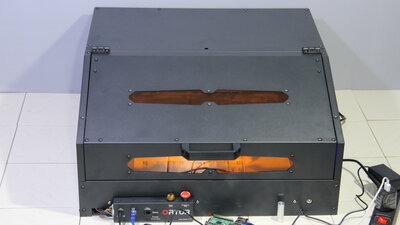
In a second care package from Ortur there was a metal box, that is available as an extra and which encloses the laser engraver. This box fulfills several protective functions:
Yes, a laser engraver is definitely not toy for the kids! 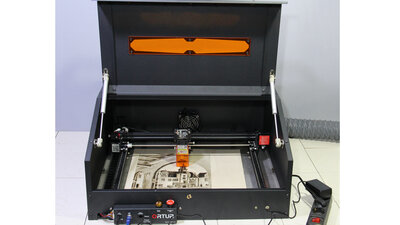
With that in mind it is forgivable that the engraver is not switched off when the lid is opened - the additional protection attached to the laser head also prevents a direct view into the laser beam. 
The Ortur Laser Master 2 Pro can only engrave flat workpieces, as the laser beam can only be focused on one plane. With the help of an additional module, that is available as an extra, cylindrical objects can also be engraved. 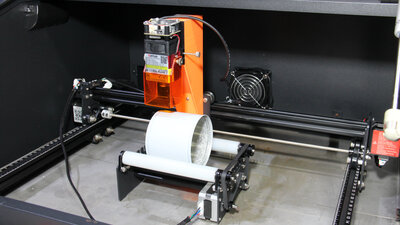
According to the instructions, the frame of the laser engraver should be lined with blocks so that the laser beam can be focused on the workpiece. If the machine is operated in the safety box, that doesn't work. I have used a 3D printer to create a special mount that sets the laser head to a higher position (Download). Instead of the motor of the Y-axis, the motor of the small lathe is connected to the control electronics. To do this, the machine must be switched off beforehand, as the motor drivers tend to emit magic blue smoke if the wiring is disconnected while the motor is energized! With the lathe you can for example create individually designed cans. Electronics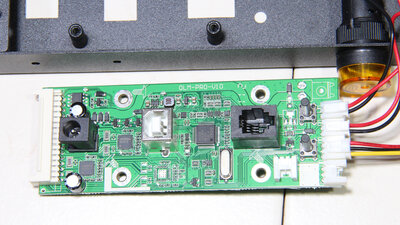
The control electronics is housed in a metal box on the front of the device: The mainboard is populated with a CKS32F microcontroller, which runs grbl, as well as two stepper motor drivers type HR4988. 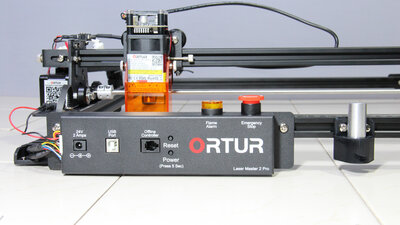
Data is transferred to the circuit board via an USB interface - an external controller for manually moving the two axes, which is available as an extra, can be connected to the second socket. Two push buttons on the front can be used to turn the laser engraver on or to reset the firmware. There is an emergency stop switch on the top of the metal box - a very useful safety feature! A buzzer emits an alarm tone if the built in flame sensor is triggered. 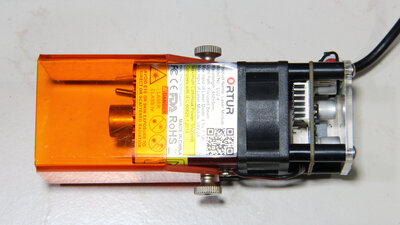
The heart of a laser engraver is of course the laser module: This is available with different power levels, my version has an output power of 5500mW. The input power is 20W, so that most of the electric power is transformed into heat which is dissipated via an aluminum heat sink with an attached cooling fan. As protection against the high-energy laser light there is a transparent, orange-colored plastic cover on the bottom of the laser head, but even with that, you must wear protective goggles when working with lasers! 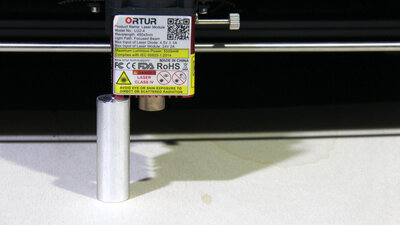
The laser head has a fixed focus, the height of the unit has to be adjusted for focusing. The focusing tool included in the package is a cylindrical spacer that must fit between the workpiece and the lower edge of the laser module. Examples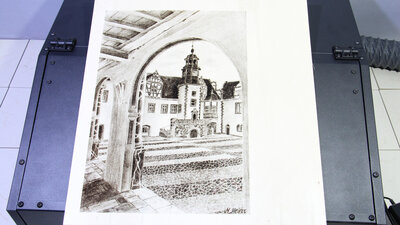
Bitmap graphic on plywood: With the dimensions 28x39cm, the graphic occupies almost the entire work area of the Ortur Laser Master 2 Pro and is finished after about 18 hours. I have used just 30% of the maximum power of the laser module for the engraving - if you set the laser power to a higher value, the time is reduced accordingly. With optimized software on top, the time span can be shortened to around 4 hours - processing 1.7 million pixels and burning 740000 dots takes some time. Here I have adjusted the grid to a distance of 0.25mm between two dots, which results in a pixel density of around 100 DPI. I really like the quality of the result, the graphic was precisely transferred to the plywood sheet. 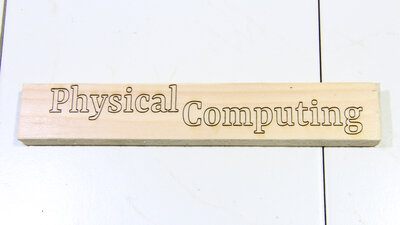
Here I have used a vector graphic for the lettering. The software doesn't process that file line by line, but moves the laser beam along the edges of the letters. 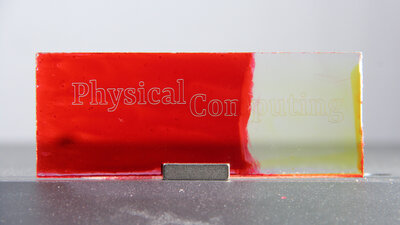
If a material cannot be vaporized directly, a bit of paint can help. In order to prevent the laser from penetrating the transparent plastic with almost no effect, a layer of paint is applied to the surface. The laser burns the paint and the resulting heat is transferred to the surface of the plastic, by what parts of that material are also removed. The paint must absorb the laser light, which works best with black color, however the red color used here works as well. Here, I have applied the paint on the bottom side of the plastic - the laser does not leave any traces on the top side. The engraved workpiece demonstrates that the laser master 2 Pro can engrave very fine lines. With the paint applied evenly on the backside, the lettering can be read clearly while the plastics on the front side protects the paint from scratches. I wiped off the paint on the right, which shows that the laser has removed parts of the plastic - the lettering is also visible without the paint. 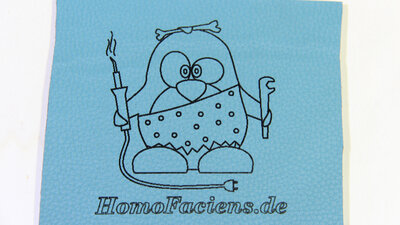
Direkt gravieren kann man Grafiken auf allen Materialien, die der Laser verkohlen oder verdampfen kann - hier zu sehen mit Kunstleder. Während der Geruch von verbranntem Holz noch so einigermaßen erträglich ist, stinkt verbranntes Kunstleder gewaltig und nur dank der Metallbox mit integriertem Abzug kann das Material im Bastelkeller verarbeitet werden. Selbst nach dem fertig-Gravieren sollte man das Kunstleder noch ein paar Stunden ablüften lassen. 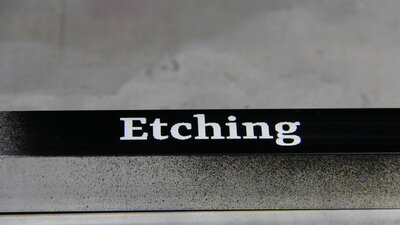
Metal surfaces can be machined indirectly with the laser engraver: Here I have sprayed a layer of black paint on a piece of aluminum square tube which is now removed with the laser. Aluminum is a good heat conductor, so that a high burn time is needed to vaporize the paint. Caustic soda is now applied to the surface, which dissolves the aluminum. After a few minutes of reaction time and after washing off the lye, the etched areas are clearly visible - looks nice. 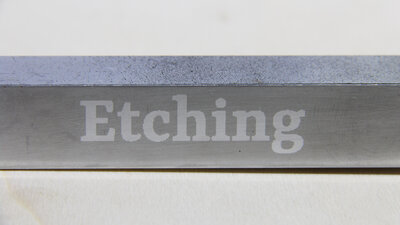
If the remaining paint is removed with a solvent, the etched lettering can be clearly read. 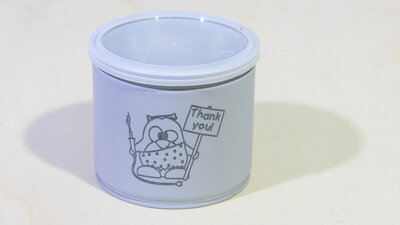
You can create individually designed cans with the extra module. 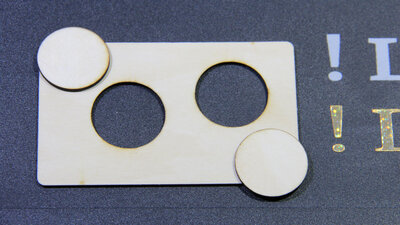
If you can carbonize or vaporize material with a laser, you can also cut through it. That's what I am now demonstrating this with this piece of 1mm plywood: Thgere is a lot to tell about cutting material with the help of a laser and I will demonstrate how and why to add air assist in another chapter. SoftwareThe software used in the video are Python scripts and I use the Ortur Laser Master 2 Pro to teach programming of CNC machines in course of my series on "Physical Computing". This is why there is an extra chapter on the software of the laser engraver.<<< CNC 3018Pro Mostics Aufero Laser 1 >>> News The Project Technology RoboSpatium Contribute Subject index Archives Download Responses Games Links Gadgets Contact Imprint |
|
|