|
|
|
|
News The Project Technology RoboSpatium Contribute Subject index Download Responses Games Gadgets Contact <<< Imprint ...to be continued. >>> 3D printer CR-10V2The video about the CR-10V2Buying the printer at Gearbest.com helps keeping my projects going. Special price with Coupon-Code: GB1111CR10V2 Only a small spool of white PLA filament comes with the kit, thus don't forget to order filament. Details about the CR-10V2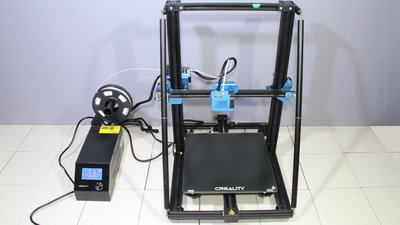
I already have tested the two predecessors CR-10 and CR-10S in detail and I can say that both devices are great printers. Creality has continued to evolve the CR-10 without getting lost in gadgets or even making things worse. The above-average working area of 30x30x40cm was kept constant over the years, same as the basic construction using extruded aluminum for the frame and an the external box for the electronics. Thankfully, even in the latest edition of the 3D printer, there is no colored touch screen with closed source drivers and also no cloud connectivity or other frippery! Same as in the first version of the CR-10 the LCD has a resolution of 128x64 pixels and the device is still operated via a rotary switch. 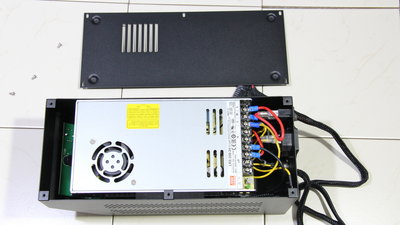
The output of the power supply is 24V DC at up to 14.6A, corresponding to 350W. After turning the device on, you can still hear the fans inside the electronic box, but the noise level is far more pleasant than with the very loud predecessor models. 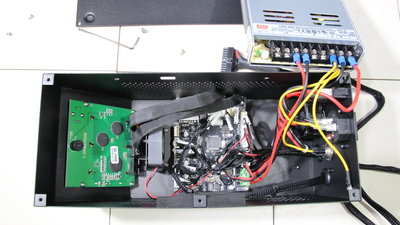
The interior of the electronics box is very tidy, all plugs are locked in place with some hot glue. Thanks to the ATMega2560 chip on the mainboard, the simple LCD and the rotary switch, all versions of the CR-10 run with open source firmware - a customized version "Marlin" is used here. Thanks to a new stepper control, the motors are also running much quieter than the predecessor models - you almost can't notice any noise. 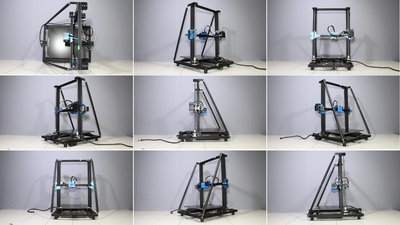
The most striking feature of the new version 2 are the two additional struts on the frame, giving the printer a higher stiffness - only two more round rods, on the right place. 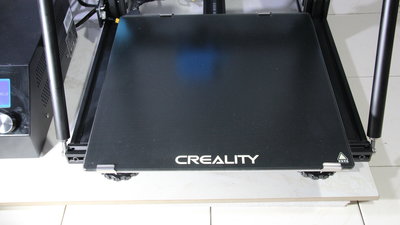
The glass tile on the print bed is now coated, resulting in better adhesion of your prints. The metal clamps which keep the glass plate on the print bed, are smaller and so the printhead won't crash into them when ever the whole print area is needed for large projects. However, smaller means that these are a bit more fiddly to operate. 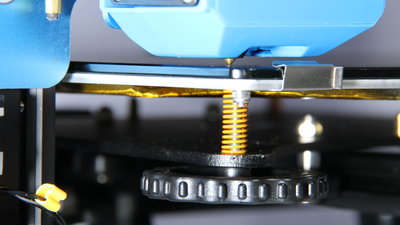
The new, extremely large knurled nuts for adjusting the height of the print bed are much more comfortable to use - before the printer is switched on for the first time, the build plate is brought to a low position. Unfortunately, there is no way to automatically drive the print head to the corner points of the build plate through the printer menu, a feature that was implemented in the firmware of the CR-10S. I therefore use a special G-code file, which drives to the corner points and stops at these for 15 seconds. Before the printhead moves to the next point, there is a warning beep sound. Leveling is now business as usual: The print bed is raised step by step, until nothing but a sheet of paper fits tightly between tip of the nozzle and print bed. 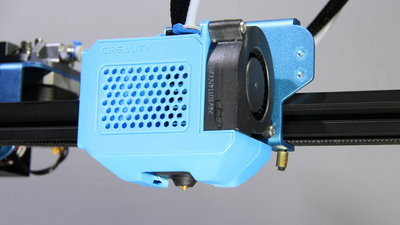
The part cooling fan is larger than it was at its predecessors and the air is now blown from the left and right to the tip of the nozzle - as we will see later, this improvement works very well. Another new feature is the rubber insulation on the hotend, which, among other things, prevents the air flow for part cooling from hitting this part of the extruder. 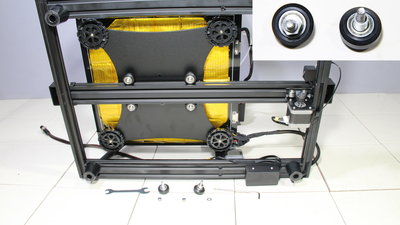
The movement of the print bed along the Y axis is still guided by 6 rollers. However, the middle pair of rollers always acts as an undesirable pivot point or is adjusted in such a way that it does not really touch the guiding rail making it more or less useless. Same as at the two predecessors, I have removed the center pair of rollers. All pairs of rollers are designed in such a way that one roller can be pressed against the aluminum profile via an eccentric nut so that backlash can be eliminated. To my mind this design is much better than the use of cheap linear ball bearings, which often come with too much backlash having no chance to compensate. There is wear on the plastic rollers during operation, especially at the beginning, until the contact surfaces got planar over time. All in all, the wheels have proven to be very robust - there was no need to replace them at one of the predecessors I own - a little bit of lubricant reduces friction and so wear. 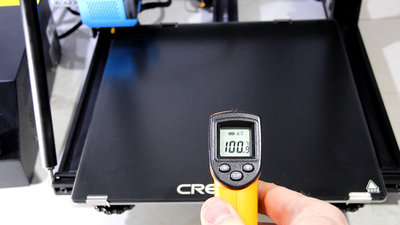
There is a thermal insulation on the bottom side of the print bed. A maximum temperature of 110C° can be set via the printer menu. 40°C are reached after about 3 minutes, 60°C after 5 minutes 90°C after 11 minutes and 100°C after 14 minutes, which is more or less the maximum temperature, with the environmental temperature in my video studio being only about 14°C. The print bed heating is obviously more powerful than it is at the predecessor models. 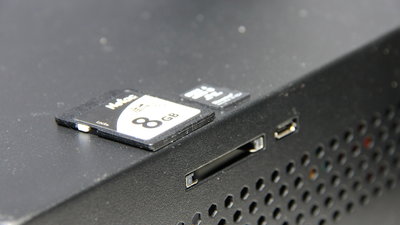
Print jobs are now stored on a standard size SD card - the small microSD cards of the previous models sometimes disappeared in the electronics box due to carelessness. You can get more pictures of the CR-10V2 as download package (42MB). Sample prints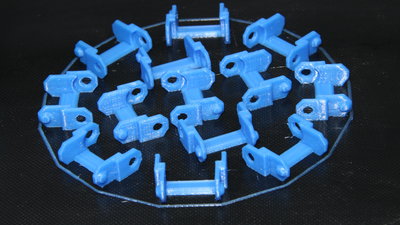
Chain links rover: Material: PLA Nozzle: 0.4mm Layer height: 0.2mm Print time: 1.5 Stunden Dimensions: 20x25x9mm With the different arrangement of the chain links on the print bed you can check whether the part cooling works fine from all sides or if something is wrong with the movement of the X and Y axis. 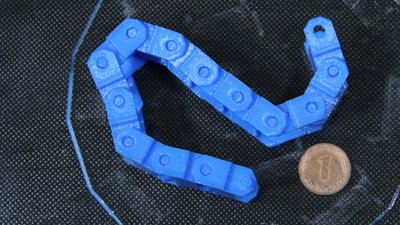
After the job is done, the chain can be assembled directly out of the printer. 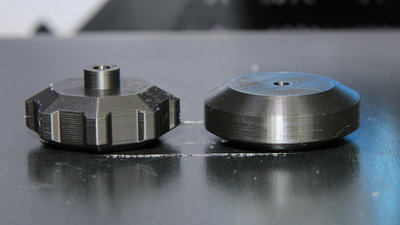
Robver wheels: Material: PLA Nozzle: 0.4mm Layer height: 0.2mm Print time: 2 Stunden Dimensions: 42x91x20mm Especially on the drive wheels there are pointed overhangs that are printed perfectly due to the good working part cooling fan. 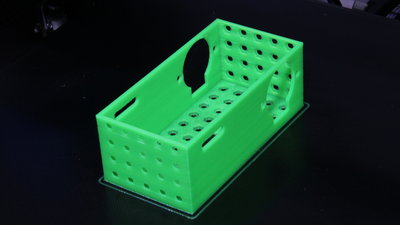
Robot chassis: Material: PLA Nozzle: 0.4mm Layer height: 0.2mm Print time: 2 Stunden Dimensions: 55x110x41mm The chassis has lots of 3mm openings for attaching payloads. The wall thickness is just 2mm with hexagonal openings for 3mm nuts on the inside. You can see slight warping at the corners of the base plate not at least caused by the low environmental temperature of no more than 14°C in my video studio - the overall adhesion on the build plate is quite good. The walls of the robot chassis are really straight and also the cutouts for motors and rear axle look good. 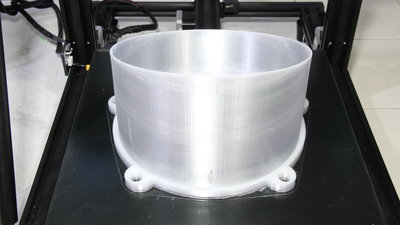
Mount headlamp Golf II: Material: PET-G Nozzle: 0.4mm Layer height: 0.2mm Print time: 45 Stunden Dimensions: 230x210x140mm The layer height is set to 0.2mm as in the previous prints. For large components like this one, a higher value is recommended to shorten the printing time. Especially with this headlight mount that comes without fine details you could use a 1mm nozzle - with my standard settings used here, the print is some sort of reliability test. Due to the glossy surface of the transparent filament, there is a visible vertical seam to the left being the starting point for multiple layers - it is clearly visible, but hard to feel. Furthermore, vertical lines are noticeable, which are mainly due to the fact that the circles in my CAD model are divided into only 100 segments, which is obviously not enough for the large diameter. 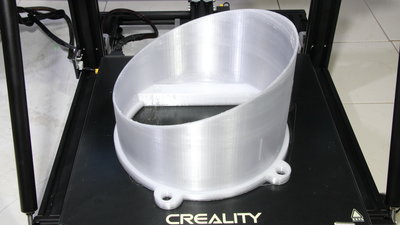
Mount headlamp Golf II: Material: PET-G Nozzle: 0.4mm Layer height: 0.2mm Print time: 45 Stunden Dimensions: 230x210x140mm <<< Imprint ...to be continued. >>> News The Project Technology RoboSpatium Contribute Subject index Archives Download Responses Games Links Gadgets Contact Imprint |
|
|