|
|
|
|
News The Project Technology RoboSpatium Contribute Subject index Download Responses Games Gadgets Contact <<< London Taxi TX2 Circuit symbols >>> Solar generatorThe video about my solar generator.About my solar generator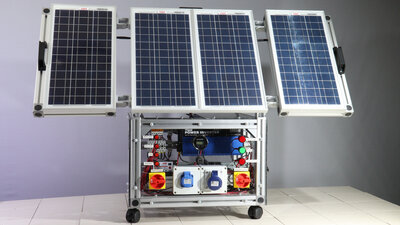
From the RS group I received the material to build two solar generators for one video on my second channel "How Open Is This Gadget?" . Variant number 1 was specified by RS and is designed as a learning object for training workshops - take a look at the page to find out the details. 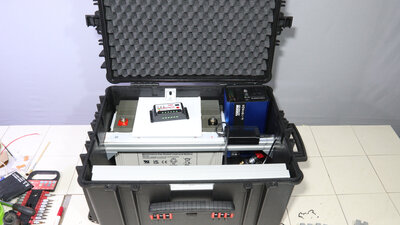
I always wanted to have a solar generator for my projects and now that all the "lumps" were in my basement, it was time to build one. What variant number 2 will look like was entirely up to me and I decided on a more practical way to arrange all the components. Instead of the aluminum frame I opted for a waterproof plastic case. Components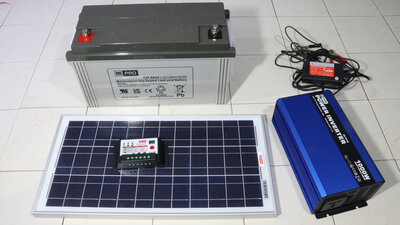
The interior of this container is reduced to what is necessary for my purposes: The core components are identical with 20W solar panels, a lead-gel battery, a solar and a mains charger, and a 1kW inverter. 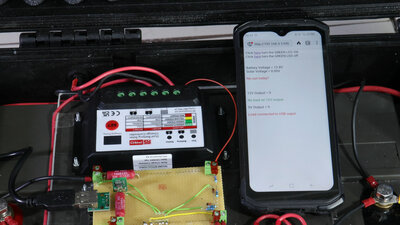
A microcontroller is essential for my projects - I chose an Arduino GIGA, which can be connected to the outside world via WLAN. With the help of this microcontroller, various parameters of the solar generator can be queried via WLAN: Using 100 milliohm resistors as current sensors and by monitoring the voltages on the battery and solar panels, the charging process and the electrical power drawn can be monitored. Of course, more functionalities can be implemented with the Arduino GIGA and the web interface can be modded to a more fancy look - let's see what else I will come up with once the generator is up and running. The system cannot be used as a classic balcony power plant because the inverter cannot feed energy into a power grid. Assembly
At a whopping 31kg, the heaviest component in the case is the lead-gel battery, which is held in place with aluminum system struts. 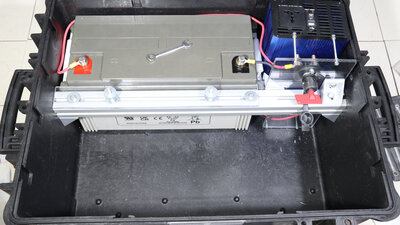
The inverter is right next to it and is connected to the battery via a circuit breaker, as 230V are rarely needed for my projects. 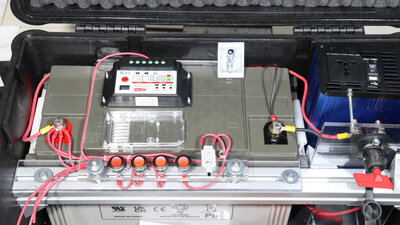
As a low-voltage tinkerer, 5V for USB devices via a step-down converter and sockets that are connected to the 12V battery are routed to the outside. The latter are protected against short circuits with a resettable 8A fuse. The loads can be disconnected from the battery using switches. The external charger, which can be used to recharge the battery with mains voltage if necessary, is not permanently wired to the battery. The cabling is a mix of soldered, crimped and screwed connections. 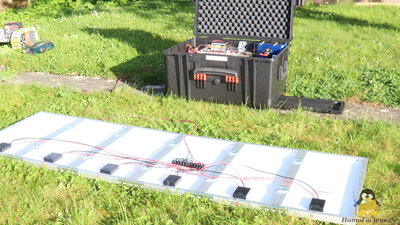
The solar panels also find their place in the suitcase - I use 6 of them. For operation, the panels are joined by screws and pieces of a cap rail and stabilized with additional pieces that are clamped to the top of the frame. The solar panels are connected in parallel via screw terminals on the back side of one of them. From there, two cables run to a socket on the back of the case. The nominal total power of the solar panels is 120W, which under optimal conditions would take 12 hours to fully charge the 12V 120Ah battery without losses. Parts listThe table only lists the core components.
<<< London Taxi TX2 Circuit symbols >>> News The Project Technology RoboSpatium Contribute Subject index Archives Download Responses Games Links Gadgets Contact Imprint |
|
|