|
|
|
|
News The Project Technology RoboSpatium Contribute Subject index Download Responses Games Gadgets Contact <<< Apache Webserver Python: USB Comunication >>> Apache WebserverUsing Python for fileupload to a webserverIn order to be able to upload files to a web server, an appropriate program must be running on that computing device that stores the received data in a file. In this chapter, I'll use a Python script that provides this function. The previous chapter describes how to install and configure the web server "Apache" to make Python scripts being executed. I found the example script shown here on cgi.tutorial.codepoint.net and made only a few modifications.The script must be stored as "fileupload-server.py" in the "python" subdirectory of the web server. The script must also be executable and the user "www-data" must have write access to the "python" directory! sudo chmod a+x /home/pi/www/python/fileupload-server.py sudo chown www-data:www-data /home/pi/www/python -R The received file is stored in the script directory, which is the "python" subdirectory of the web server. The script uses the "print" commands to create an html file which, if the file is received successfully, outputs the message "The file upload.bmp was uploaded successfully". If something went wrong, the message "No file was uploaded" is displayed. In both cases, a line of Javascript is generated, which causes that the "index.html" file in the parent directory (which is the base directory of the web server) is called by your browser after 3 seconds.
A simple HTML file on the webserver for client interactionThe file transfer should take place via a browser, which means that an html file is required. The example described here must be stored under the name "index.html" in the base directory of the web server (/home/pi/www). The file is called via the IP address of the web server in the browser (see previous chapter). The selection of files is limited to bitmaps (* .bmp), but in principle all file types can be uploaded using the procedure described on this page."It doesn't work!"...is, as told before, no statement suitable to get any help! Each installation step of the Apache web server outputs a message. Please read these messages through, because that's what the programmers wrote the messages for! Search the internet for these error messages and you will find Gigabytes of help. If everything (apparently) went smoothly during the installation, but it still does not work, the browser displays an error that can help finding the cause of error. Even better are the error messages, the web server generates in it's log file:tail /var/log/apache2/error.log The messages stored in this file are especially helpful if you want to ask someone for help. For simple problems this can be done via leaving a comment on this page. For trickier problems you should read how you can get in touch with me in my column contact. "It works!" is a statement that needs no further explanation, but makes me always happy to read. ... and anyone who would like to thank me in particular for these instructions or any kind of help can make a donation to give me a boost in motivation for creating more of such chapters - many thanks to all backers that already sent me an obol! 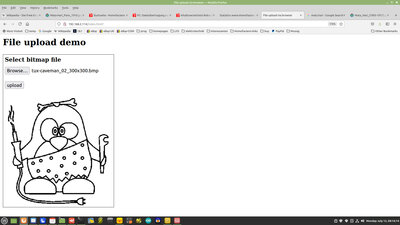
...if the bitmap appears, everything is installed correctly. The Apache web server runs smoothly even on a Raspberry Pi Model B+. I called the script with a smartphone - no "app" is required, a simple browser is sufficient. <<< Apache Webserver Python: USB Comunication >>> News The Project Technology RoboSpatium Contribute Subject index Archives Download Responses Games Links Gadgets Contact Imprint |
|
|