|
|
|
|
News The Project Technology RoboSpatium Contribute Subject index Download Responses Games Gadgets Contact <<< Imprint ...to be continued. >>> 3D printer Longer Orange 10The video about the Longer Orange 10 3D printerBuying the printer (or anything else) from my Sponsor Gearbest.com helps keeping my projects going. Have a look at the column Shopping Tips to get more special offers. The printer ships with only 250ml of resing. You can get more of it at Gearbest. Note that the resin must be specified for 405nm UV light. How it works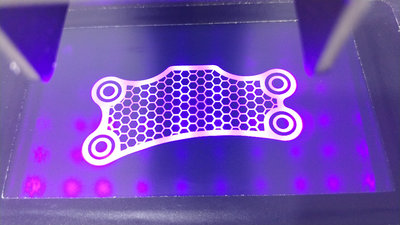
The Longer Orange 10 is a 3D printer that hardens photosensitive resin layer by layer using ultraviolet light. The mask for selective exposure of the individual layers is generated by an LCD screen. The resin remains liquid at the unexposed areas in the layer, where ultraviolet light hits the resin, it solidifies. As soon as the resin is sufficiently hardened, a stepper motor lifts the object to be printed for the layer thickness and the exposure mask of the next layer is generated by the display. The resolution of the display is 854 x 480 pixels while having the dimensions 98 x 55mm. So we get about 8.7 dots per mm corresponding to 222 dots per inch or the other way round: one dot is about 115μm in size. The ultraviolet light is generated by an underlying matrix of 4 x 7, a total of 28 LEDs. 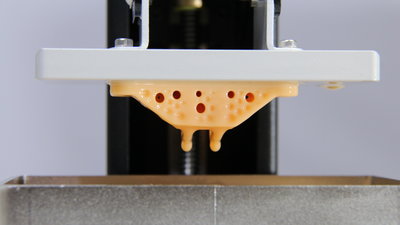
The Orange 10 uses light with a wavelength of 405nm, which is in the ultraviolet range. The polymerization reaction of the resin must be sensitive to that wavelength - this type of printer only works with specified resin. During printing, the object grows layer by layer being pulled up out of the resin tank. As can be seen, the print is created upside down. 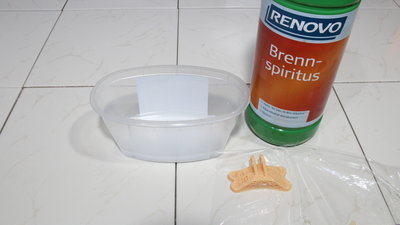
Once printing is complete, the object has to be post-processed. After removing the print from the build plate, uncured resin on the surface must be rinsed off. I use alcohol from a hardware store - the resin is almost insoluble in water. Rinsing with water after the alcohol bath should follow. Even better is using an ultrasonic bath or a special washing station. 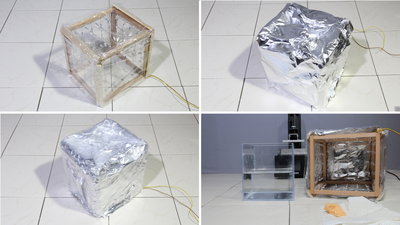
The printed object is still quite soft - ultraviolet light is required to allow the resin to cure completely. To make it simple, place the object in sunlight - however I made a box equipped with 75 LEDs emitting ultraviolet light. The benefit is that you are independent from weather and time of day and the curing takes place under controlled conditions. The water tank keeps oxygen largely away from the resin to be cured, which prevents the surface from remaining sticky. After about 3 hours the print is completely cured - the diodes I am using are not very powerful. The first layer is warping film used as electric insulation. The second layer is aluminium foil to keep the UV light inside the box. The third layer is warping film again to stabilize the construction 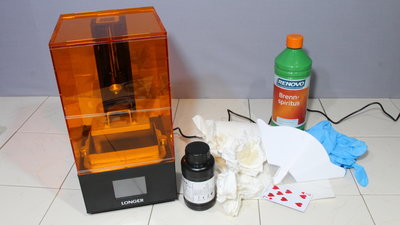
After printing, the device needs to be cleaned which, at least for me in the first attempt, did not work quite as smoothly as in the manufacturer's demo video - routine helps to keep the mess down. The cleaning agents and materials needed are part of the bill. About the device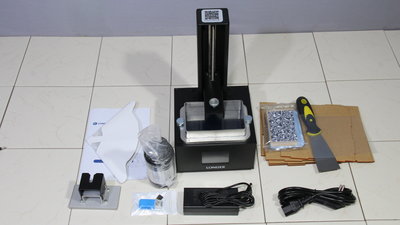
The Orange 10 ships almost completely assembled with all components needed for first prints. Only the orange cover has to be assembled out of 5 parts. The panels are held together by elastic bands. The maximum print volume is 98 x 55 x 140mm the printer is therefore suitable for rather small projects. The advantage is a very compact device with a base area of only 17 x 17cm at a height of 36cm. 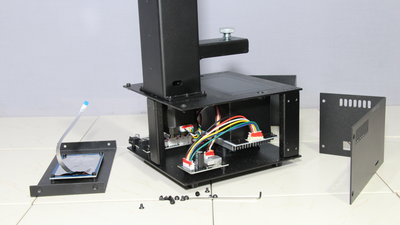
The electronics are inside the very sturdy and repair-friendly metal housing. After loosening 12 screws, the three side panels can be removed, so that all components are freely accessible. 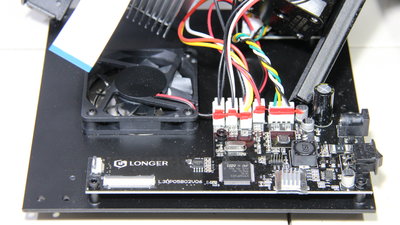
The plugs on the main board are locked in place by adhesives and the wiring is well arranged. 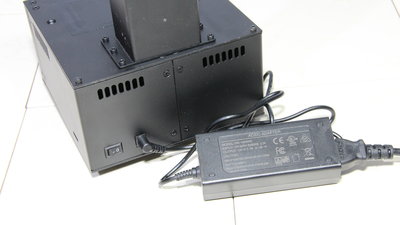
The 60W DC power supply, which provides 12V at up to 5A, is well insulated and heats up just slightly during operation, which is an indication for a good efficiency. 
After turning the printer on the main menu appears on the 2.8 inch touchscreen on the front of the device, which often requires a second or third attempt before reacting to inputs. The fan makes a really audible sound and since it is not temperature-controlled, the loud background noise remains constant during operation. 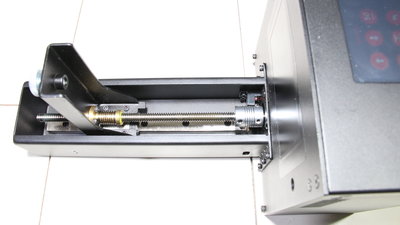
The Z-axis is guided by a single linear steel rail and it is driven by a stepper motor through a spindle. This is the only moving part of the mechanics of this type of printer. Sample printe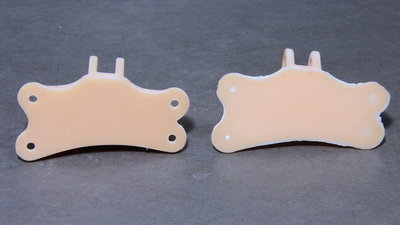
Sample print "Bracket" Layer height: 0.05mm. Dimensions: 58x35x20.2mm Print time: 90 minutes The first layers are printed with a longer exposure time so that the resin sticks well to the build plate. Due to light reflections on the aluminum surface, the resin hardens beyond the exposure mask resulting in a thin seam around the base of the print. Furthermore, fine structures disappear in the first layers - the 3mm holes of the test print are completely closed however this layer is only very thin and easy to remove. 
# The fine lattice structure of the test print is very detailed, the individual layers can only be identified with a very close look. 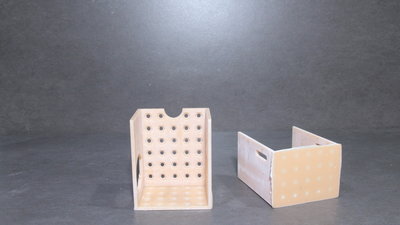
Sample print "Rover Chassis" Layer height: 0.05mm. Dimensions: 55x41x67.5mm Print time: 9 hours Overall, the layer thickness of only 50 micrometers results in very smooth surfaces. The quality of the parts is very good, the two halves of the robot chassis fit together out of the printer. 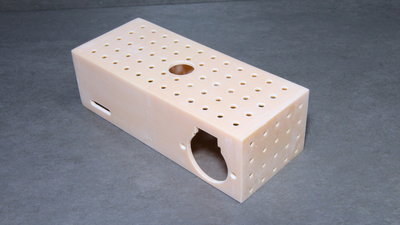
There is no visible air gap between both parts and the walls run straight from top to bottom - the resin warps not noticeably. On this picture the halves of the robot chassis are glued, the mount holes on the front side are drilled and the surfaces are sanded. 
Sample print "Rover Wheels" Layer height: 0.05mm. Dimensions: 43x43x18mm Print time: 90 minutes The inclined surfaces of the wheels are also quite smooth, and the individual layers can only be identified if you look very closely. The pointed overhangs of the toothed drive wheel were printed nicely. I had to enlarge the cutout for the motor shaft slightly in the CAD model - the resin shrinks when it hardens. 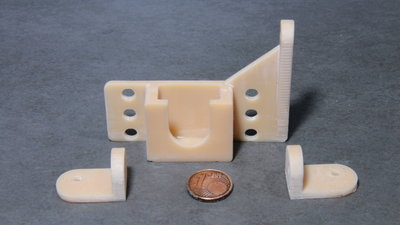
Sample print "Raspberry Pi camera mount" Layer height: 0.05mm. Dimensions: 67x45x52mm Print time: 3 Hours 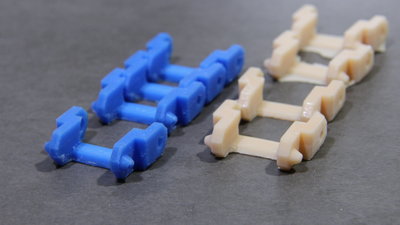
Sample print "Chain links" Layer height: 0.05mm. Dimensions: 20x26x9mm Print time: 60 minutes For comparison, I have printed the tiny 20 x 26 x 9mm chain links from PLA with my Ender using a 0.2mm nozzle and a layer thickness of 0.05mm. The prints made with the Orange 10 look a bit smoother, the only drawback is the brittleness of the cured resin: The links cannot be assembled to a chain, as is the case with the parts from the filament printer. <<< Imprint ...to be continued. >>> News The Project Technology RoboSpatium Contribute Subject index Archives Download Responses Games Links Gadgets Contact Imprint |
|
|