|
|
|
|
News The Project Technology RoboSpatium Contribute Subject index Download Responses Games Gadgets Contact <<< Imprint ...to be continued. >>> 3D printer Anet A8The video about the Anet A8 3D printer kitGet the printer at Gearbest.com. No more than 10m of filament come with the kit, thus don't forget to order filament. A useful accessoire is nozzles with various diameters (0.4, 0.3, 0.2mm). Ordering blue tape sheets for the print bed is also a good idea. Have a look at the column Shopping tips to get special offers for various 3D printers. Assembly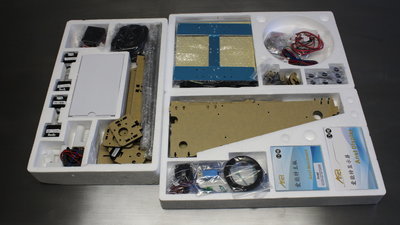
Same as the Tronxy P802 of the previous chapter, the Anet A8 comes as a kit. There are less sscratches on the surfaces, the 7mm acrylic plastcs was covered with protective foil at both sides. The build instruction is on a micro SD card that is inserted in a USB reader. The tools included are a side cutter, a wrench, four hexagon tools as well as two screwdrivers - it's all that's needed for the assembly. 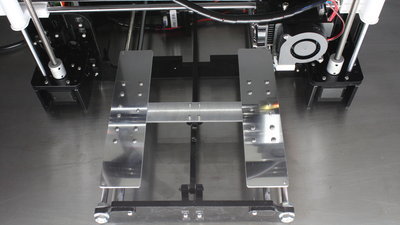
The H shaped plate underneath the heated bed is mounted the other way round as drawn in the build instruction, by what the mount of the belt gets 6mm more in line to the Y axis. 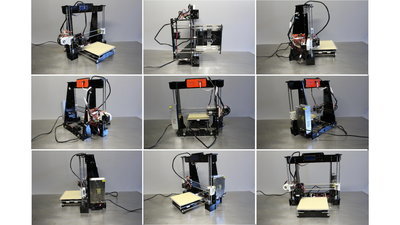
The assembled printer. Electronics
Mainboard of the Anet A8: The screws of the clamp connectors on my board were tightened with a torque that only a titan can generate! Loosen those screws before assembling the board and hold the clamps with a caliper to avoid ripping off the soldering points. 
The insulation of the power supply isn't sufficient and there is no strain relief for the mains cable. 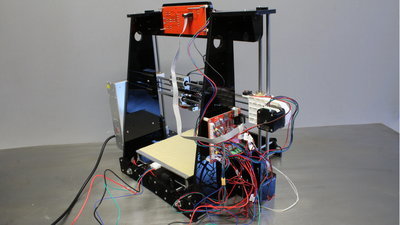
The cable spaghetties can get tided up with spiral tubes and cable straps. Sample prints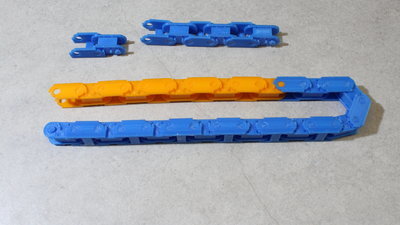
While recording the video sequences I printed many links of a cable chain. The orange links were printed with the Tronxy P802, the blue parts with the Anet A8. 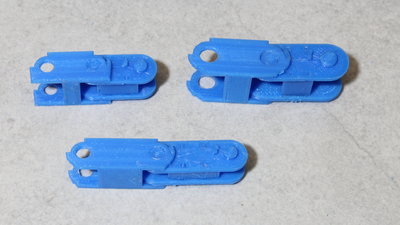
I designed the cable chain in openSCAD, so printing links with a new aspect ratio or another size is done quickly by changing nothing but a view variables. 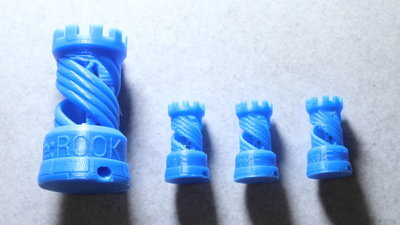
On my Patreon page I offered free sample prints for my backers. One of the wishes was the Make: ROOK, available on Thingiverse. This file is used for testing SLS printers, that usually have a much better resolution than the Anet A8 which is why this figure is no suitable test scenario. To the left, the figure is printed in double size to give the Anet A8 the chance to print all details. The original size is no more than 14x14x24mm. Adjustments (from left to right): (1) 0.2mm nozzle, 0.1mm layer height, 6h print time (2) 0.4mm nozzle, 0.1mm layer height, 30m print time (3) 0.2mm nozzle, 0.1mm layer height, 1h print time (4) 0.2mm nozzle, 0.05mm layer height, 2h print time At (2) the spiral at the center of the tower is missing. That's not because the Anet could not print the structure, but because the software (Slic3r) did not adopt it into G-code, simply because the spiral is too thin for printing with a 0.4mm nozzle. Same is for the characters "ROOK", that were not adopted completely. It's also no problem of Slic3r, but simply a matter of Physics and Maths... You can adjust a layer height of 0.05mm in Slic3r (4), but it makes absolutely no sense! Print (3) has the most details. Filament printers can't print curved bridgings (at least not without support structures) which is why filament strings are hanging on top of the opening of the tower. As written before, this test was not meant for filament printers. You can get the full resolution photos I made from the prints as Download package (40MB). <<< Imprint ...to be continued. >>> News The Project Technology RoboSpatium Contribute Subject index Archives Download Responses Games Links Gadgets Contact Imprint |
|
|