|
|
|
|
News The Project Technology RoboSpatium Contribute Subject index Download Responses Games Gadgets Contact <<< WorldPrinter Ping Pong Plotter >>> Coil winding machine from a 3D printerThe video about the winding machineAbout the machine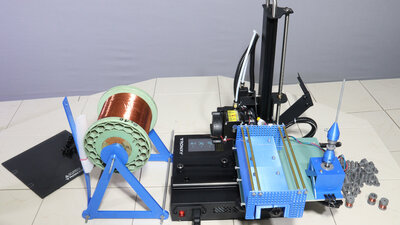
Since I need DIY electromagnets for many projects on these pages and because winding enameled copper wire is a rather boring activity, I decided to automate the process. In order to get a working machine as quickly as possible, I converted a 3D printer for this purpose. My choice fell on the Tronxy CRUX-1, which I have introduced on my project How Open Is This Gadget? in detail. The 3D printer can be converted from printer to winding machine or vice versa at any time: Convert the 3D printer to the winding machine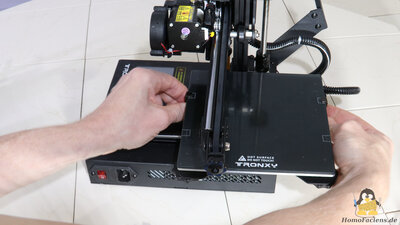
Only the glass plate on the print bed has to be removed,... 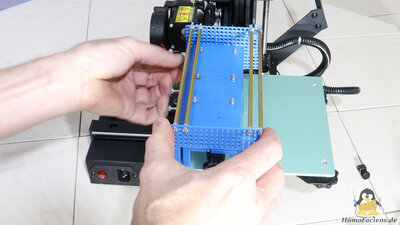
...a guide for the wire has to be screwed to the X-axis... 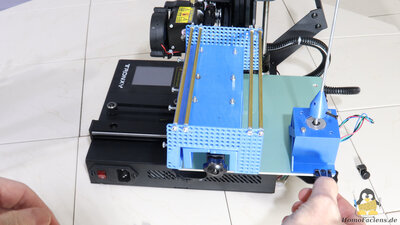
...and a stepper motor has to be clamped on the print bed. I took a stepper motor that I had in stock. It does not have to be a particularly powerful stepper motor, but the torque should not be too weak either, otherwise only low winding speeds can be achieved. 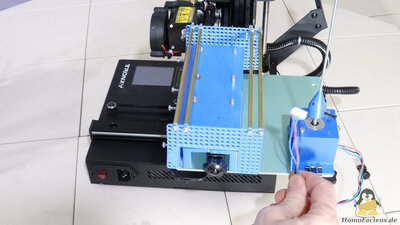
I soldered a socket to the stepper motor so that only the plug from the extruder motor has to be pulled out... 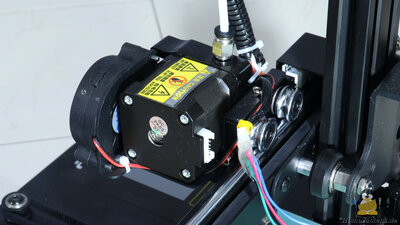
...and plugged into the new socket. 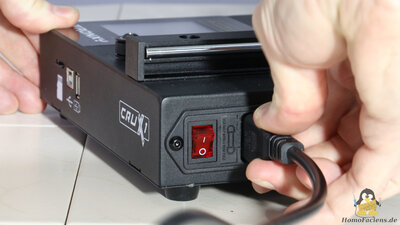
It should be noted that the conversion process must be carried out with the printer switched off, otherwise the stepper motor driver on the main board can be destroyed. Winding inductors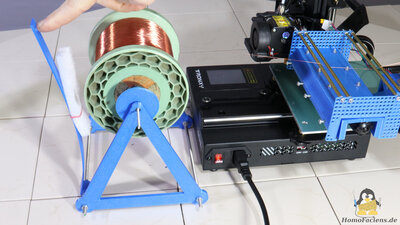
The large coil of copper wire is placed on a holder that is also composed of 3D printed parts. There is an adjustable brake on the drum to prevent the spool from moving due to inertia whenever the wire speed is slowed down. With the brake activated, the wire tension is granted throughout the winding process. 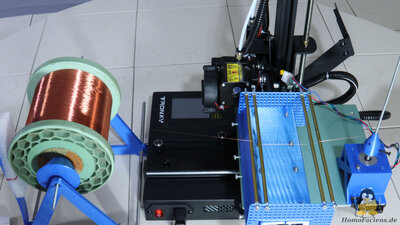
The copper wire is guided by a total of four brass tubes, which can be fixed in different positions on the mounting grid. With that, the tube positions can be adapted to different wire diameters. 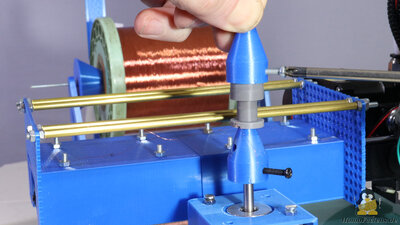
After the wire is fed in correctly, it must be attached to the spool. There is an 3mm threaded rod on the additional stepper motor, onto which the inductor core is placed and afterwards fixed by a screw. 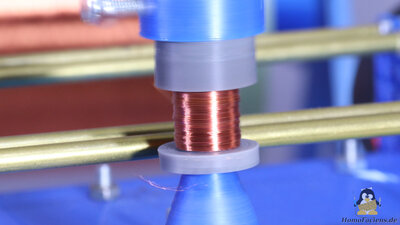
The winding of the coil is not 100% smooth: On the one hand, the wire guide is not perfect and, on the other hand, you can see the spindle wobble on the shaft of the stepper motor. Well, perfect simply doesn't exist, but the result is more than sufficient for my purposes. What is of interest to me is that all coils have the same number of turns and that the winding process is very fast - it takes just 150 seconds per coil. After winding is finished, the wire is fixed with a drop of hot glue. Software/Download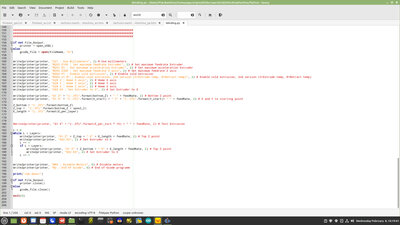
I wrote a small Python script that generates the needed move commands in G-code format. Using Gcode is an advantage as it means that no changes need to be made to the printer's firmware. The Tronxy runs fine with the standard firmware. Gcode is also why I use the extruder motor to wind the wire: The motors of the three axes can only be moved within a limited range, while the extruder motor can rotate almost endlessly without any firmwware limitations. Some parameters in the script must be adjusted for each type of inductor. The script can either send the Gcode commands to the printer via USB interface or generate a corresponding file, which is then stored on a micro SD card. With the "store to file" procedure, the printing process can be started as usual. The 3D files and the Python Script are available as Download-Pakage. <<< WorldPrinter Ping Pong Plotter >>> News The Project Technology RoboSpatium Contribute Subject index Archives Download Responses Games Links Gadgets Contact Imprint |
|
|