|
|
|
|
News The Project Technology RoboSpatium Contribute Subject index Download Responses Games Gadgets Contact <<< EDM: Mikroskop EDM: Plasma properties >>> EDM: FlushingThe video about the effekts of flushing on EDM
You can buy the Andonstar AS246 microscope on: Spark formation in air
Starting from the tip of the drill, the material that has been ripped out from the razor blade sprays in all directions. There is only one single image in this sequence that shows glowing particles. Both on the frame before and behind, not a single glowing particle can be seen. We want to look at spark erosion scientifically, so let's make a very rough estimate of how fast the metal particles whiz through the air: The video stream is recorded at 25 frames per second, so we are looking at a flight time of 40 milliseconds. The razor blade is about 50mm long. With this scale, the particles flying off to the left and right cover a distance of about 40mm before they leave the picture. The maths is simple and gives us a speed of more than 1 m/s. It can also be seen that many jets split up after a certain flight distance - the metal particles sputter in the air. Luftkühlung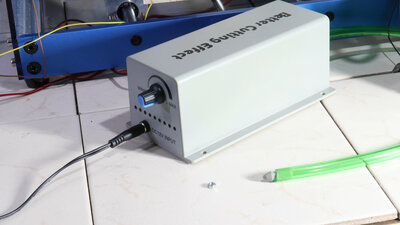
As a first cooling experiment I added air cooling to my simple EDM machine. The pump used is designed for laser cutting and, with an electrical input power of 24W, it is not very powerful, but the air flow is sufficient to effortlessly blow off an M3 nut. 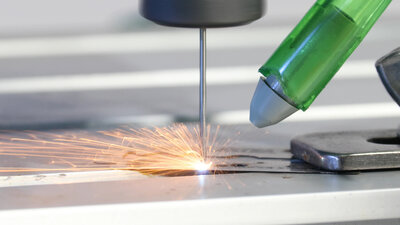
This frame shows that the sparks mainly fly off to the left, while virtually no particle beams can be seen to the right. The particles ripped out seem to be effectively carried away by the air flow. 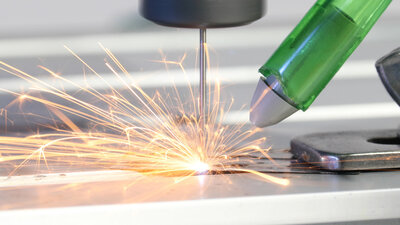
However, a second frame shows that this air flushing does not work perfectly: In the case of a particularly strong spark, many beams only bend after a visible flight path to the right, against the air flow. The speed of the particles is initially clearly higher than that of the air jet. 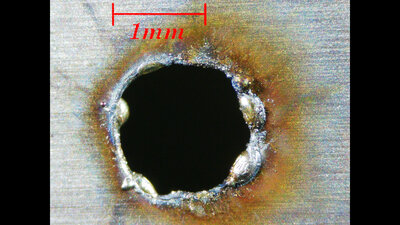
By blowing in air, more oxygen is added to the process, which means that the bright, liquid steel literally burns. The bore is therefore already completed after only 58 shots - 99 shots were required without the air flow. The resulting hole is still not perfect, but slightly more circular than in the experiment without airflow. The deposits around the edge are rust red. The diameter is around 1.4mm. Water cooling
For the water cooling that will be used in the following experiments, I glued a tub from plastic sheets. This is filled with deionized water, which has a much lower electrical conductivity than tap water. In later chapters I will tell you more about why the coolant should not have high conductivity and which agents are suitable. About 2L of liquid fit into the tub. 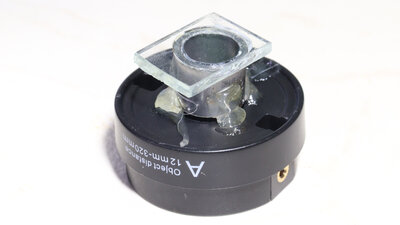
For underwater microscopy I had to attach a tube with a glass bottom to the lens. 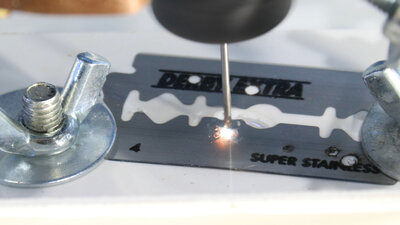
It is striking that the particles travel a much shorter flight distance in the water than in the air. The density of water is about 800 times higher than that of air, so the metal particles that are ripped out are slowed down more efficiently. Furthermore, the specific heat capacity of water is four times higher, which means that the particles flying around are cooled down more quickly and thus stop glowing earlier. Caused by the water, further chemical and physical processes take place during spark erosion. In addition to electrolysis processes, it should be noted that there is less oxygen dissolved in water, which affects the oxidation of the metal particles. Also, water is vaporized by the heat of the plasma, consuming some of the energy otherwise transferred to the workpiece. However, when the plasma collapses, the water vapor condenses again immediately, which at least partially transfers that energy back to the metal and thus contributes to the erosion process. 
It can be seen that gas bubbles stick to the surface. Because of the gas bubbles, the medium - here the deionized water - is not uniform, which has an impact on the spark formation. The formation of gas bubbles cannot be prevented, but care should be taken to ensure that both these and the particles torn out of the razor blade are flushed away from the bore. After 69 shots, the underwater drilling is complete - evem if this value is higher than that of air cooling, it is still significantly below the value without any cooling. 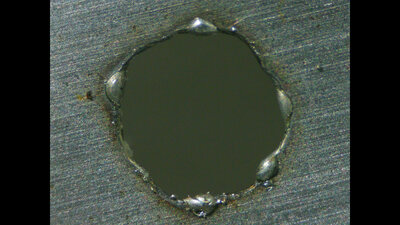
After wiping away the air bubbles, only a small area around the edge of the hole is found to be discolored. The diameter is slightly larger than in the previous experiments in air. Flushing with water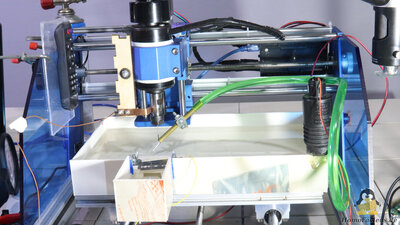
For the next experiments, I installed the windshield washer pump from a car to flush the drilling site with water. I got the pump from the scrap dealer around the corner for 5 euros. So that the water doesn't splash too much and the pump doesn't overheat during continuous operation, only 3.3V are applied to the terminals. 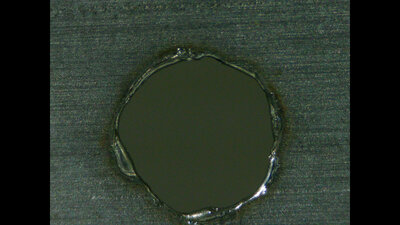
After 122 shots, the bore is finally completed, the highest value in the test series so far. The diameter is comparable to the test without a pump, but the edge looks a bit more circular and smoother. Apparently, a good portion of the spark energy that contributed to the erosion process in the previous experiments is washed away with the liquid flow. In the chapters on electronics, I will tell you more about why a lower energy transfer per spark leads to better results. 0.5mm "Deep Drill"
What is missing is drilling through a 0.5mm blade, which is 5x thicker than the razor blade that has been drilled through so far. This "deep drilling" is extremely accelerated by the liquid flushing. While most of the molten metal has solidified again and again in the drill hole without being flushed, it is now effectively removed from the hole by the liquid flow. The formation of cracks due to this constant melting and solidifying can no longer be observed. In addition to transporting away the eroded metal, the cooling effect of the water also leads to a better result. 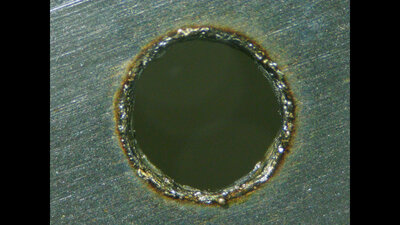
Instead of the original 7617 shots, the bore is now completed after only 530 shots - now it works out that for a 5x deeper bore only five times the time is needed. The drill bit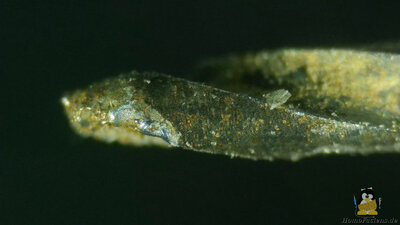
Tip of the drill bit after the experiments. <<< EDM: Mikroskop EDM: Plasma properties >>> News The Project Technology RoboSpatium Contribute Subject index Archives Download Responses Games Links Gadgets Contact Imprint |
|
|