|
|
|
|
News The Project Technology RoboSpatium Contribute Subject index Download Responses Games Gadgets Contact <<< Imprint ...to be continued. >>> 3D printer Tronxy P802The video about the Tronxy P802 3D printer kitGet the printer at Gearbest.com Not included in the kit is a spool of filament, thus don't forget to order filament. Extras
The printer comes with a 0.4mm nozzle. I have ordered spare nozzles with diameters ranging from 0.2 to 0.4mm: Order nozzles on GearBest. More parts I ordered are temperature resistant tape (Kapton) as well as an autoleveling sensor. More about those extras as soon as I did test runs. Assembly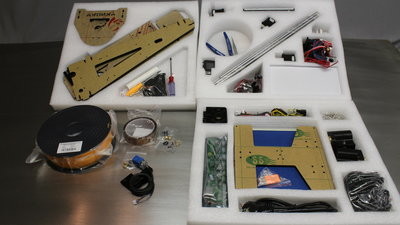
The 3d printer comes as a kit. Don't forget to order a spool of filament, because there is none included. All documentation comes on a SD card that is inserted in the USB reader. The text of the build instruction is a bit clumsy, but with the very good illustrations, you should manage the assembly without many guesses. To me, the assembly is part of the fun, furthermore you get a deep insight into the working principle of a machine while getting in touch with all of its components. 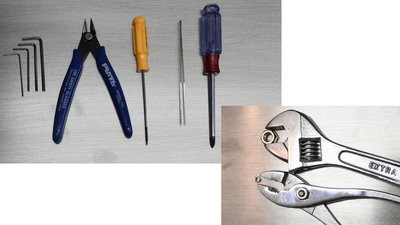
For the assembly needed and part of the kit are four hexagon tools, a pair of tweezers, a side cutter, a crosstip as well as a slotted screwdriver. Additionally a 14mm and a 5.5mm wrench or instead a gripper or an adjustable wrench should be in reach. 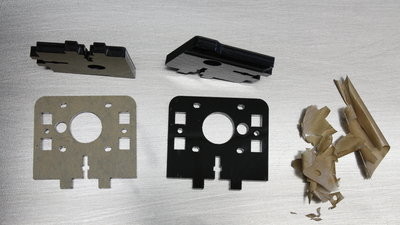
Removing the protective foil was the most fiddly part of the assembly. Even with that foil there were minor scratches on the surface of a couple of parts that don't affect the functionality. This is a tool for your workshop, not a sculpture for your livingroom... 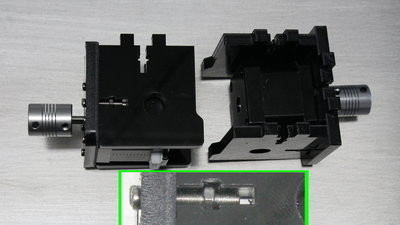
The motors of the Z axis with assembled mounts. Use the tweezers to insert the 3mm nuts into the slits of the linkages. Tighten the screws carefully!. The acrylic plastics is brittle and might crack if you apply a too hight torque on the screws. 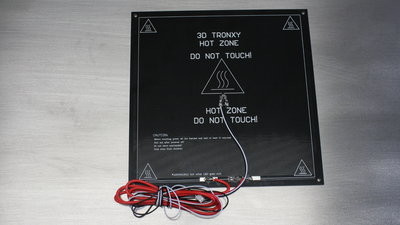
The printer has a heated print bed. The cables point to the back of the printer. 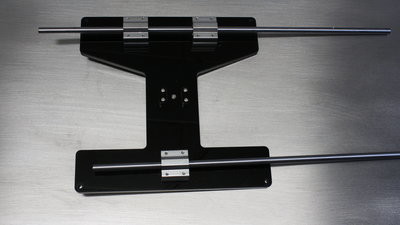
I inserted the round bars of the linear guides to align the bearings in parallel. 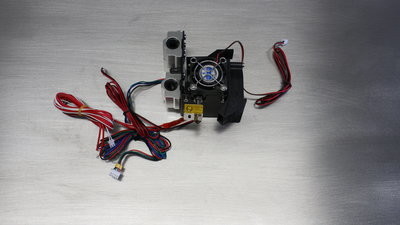
The Extruder. 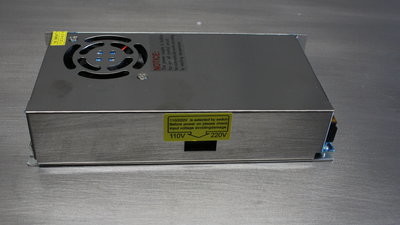
The power supply has an output of 12V at up to 20A and you must select the input voltage (220 or 110V) before turning the machine on! 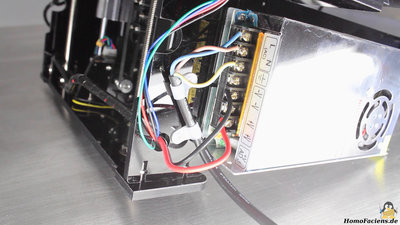
As demonstrated in the video, the insulation is insufficient. This printer is no machine for kids! I used two of the cable supports to get at least a worse strain relief mechanism for the mains cable. 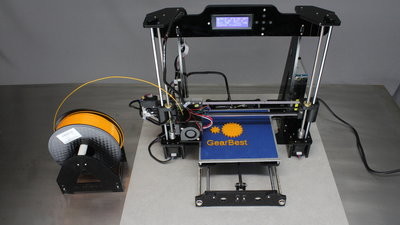
The assembled printer after it's first job. You can see all pictures I made during the assembly in full resolution in the picture gallery. Sample prints
My first 3D print ever, including my first software design for a 3D print object: Layer height 0.2mm. There are noticeably gaps on the print of the 8 teeth gearwheel. That's not due to a worse printer, but because of wrong print parameters. Click on the picture to see the full resolution image. 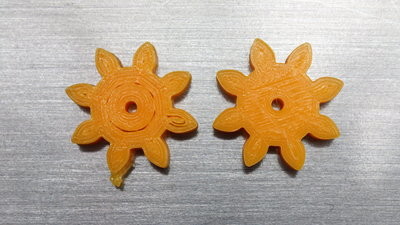
Second print of the 8 teeth gearwheel (right gear): Layer height was set to 0.1mm and in slic3er I set the Extrusion multiplier to 1.1 in the Filament settings tab. This is a great print. <<< Imprint ...to be continued. >>> News The Project Technology RoboSpatium Contribute Subject index Archives Download Responses Games Links Gadgets Contact Imprint |
|
|