|
|
|
|
News The Project Technology RoboSpatium Contribute Subject index Download Responses Games Gadgets Contact <<< Imprint ...to be continued. >>> Tronxy X5 3D printerThe Video about the Tronxy X5 3D printerGet the printer at Gearbest. Get a special price with the Coupon Code: TronxyX5 The printer ships with only 10m of black PLA, you can get additional filament at Gearbest. Assembly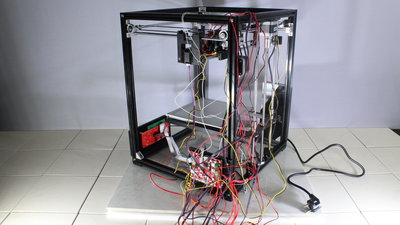
The Tronxy X5 ships as kit with no build instruction, only a PDF showing the wiring is on the micro SD card. I found a low resolution video without any audio comments on the Gearbest page that shows how to build the printer. Nonetheless I could assemble the mechanics without much trouble and you can get photos of my build process. The accuracy of the parts isn't bad, however there was an issue with the X end switch: 
That switch was broken, because the relatively heavy component it is mounted on caused damage during shipping of the printer. The plastics hinge of the metal flap was broken. As shown in the video I could fix that quickly with a piece of hot wire. Remarks about the Tronxy X5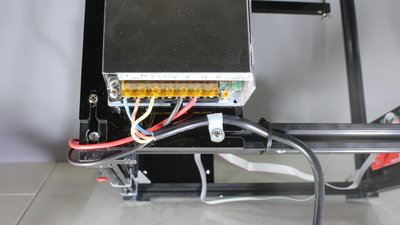
Many cheap 3D printers come with an insufficiently insulated power supply, same as the 12V 20A device of the Tronxy. You should at least add a strain relief for the mains cable. The fan of the power supply isn't too loud during operation, however you also can't call it quiet. 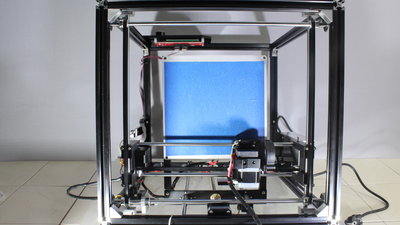
The frame of the printer is a 39.5 times 42 times 50 centimeters cube composed of 20 times 20mm aluminum bars. It's a simple and rigid design that I really like. X and Y axis move along round bars with 8mm in diameter, guided by metal bearings. 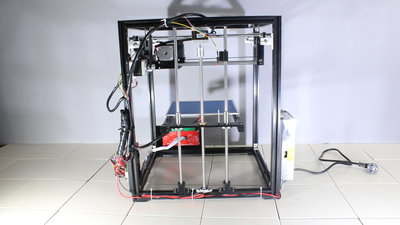
The Z axis with the print bed moves along two more round bars, driven by just one motor through a spindle. That axis is the weak point of the construction: The round bars bend easily under load because there is a long leaver to the front edge of the build plate. When pushing the print bed slightly it starts vibrating. Modifications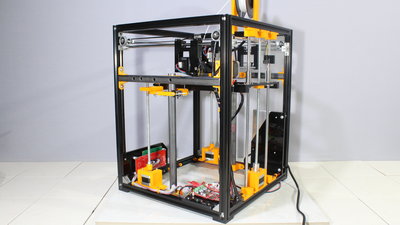
In order to make the Z axis less shaky, I have added a couple of parts. 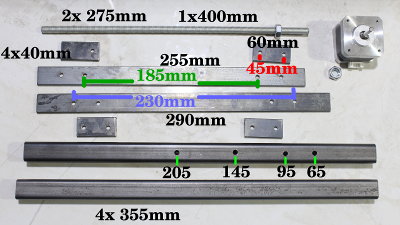
Additional guides are composed of 20mm square tubes. The build plate is connected with the new bearings through 20mm flat iron bars. Needed iron parts: 20x20mm square tube 2m 20x4mm flat iron 1m 8mm threaded rod 1m + 7 nuts 3mm threaded rod 1m + a couple of nuts 8 ball bearings 6x19x6mm 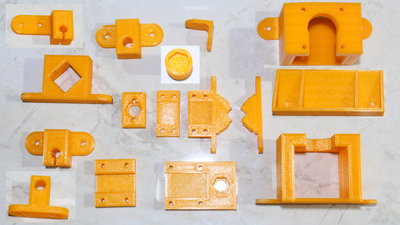
All other parts needed were printed with PLA using the Tronxy in original configuration and as you can see, the X5 could do that job even in the original configuration, thus this device isn't useless out of the box. You can get the OpenSCAD and stl files as download. 
A tripod construction eliminates backlash in vertical movement - I am using 3 stepper motors for the Z axis in this configuration. All three motors must have the same angular resolution, which is 3.6 degrees for the motors I had in stock - the original motor has 1.8 degrees per step, thus I had to replace this device as well. I am using common threaded bars with 8mm diameter as spindles. I am using stepper motors with a phase current of 0.9A at 3.96V. The voltage per phase must be below 4V, because the output voltage of the power supply is 12V. 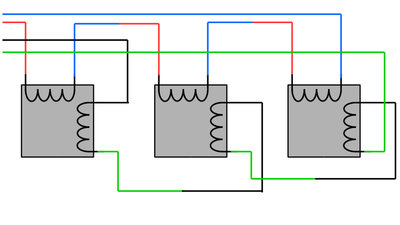
The three stepper motors are switched in series. That causes a higher total voltage per phase which is why I reduced the speed of the Z axis to just 1mm per second to keep the torque of the motors high. Furthermore I had to readjust the steps per millimeter - It's around 2550 steps per millimeter for my configuration. 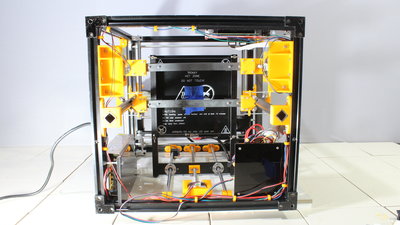
Bottom view 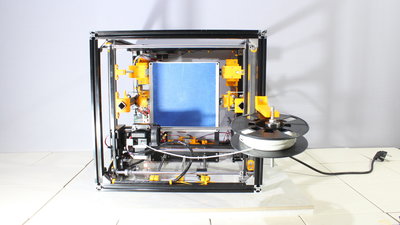
Top view 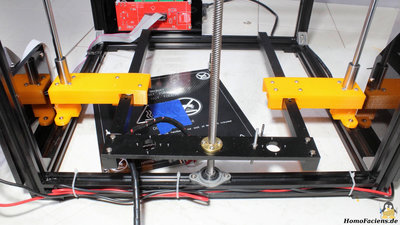
After a request I have packed the 3D files of my first, not so perfect mod in another download file. Sample prints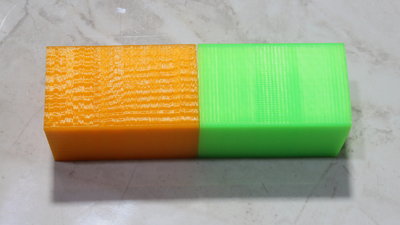
Test print "vibrations" LAyer height: 0.2mm Print speed: 40mm/s Material: PLA Dimensions: 30x30x50mm The green print was made after the modifications. 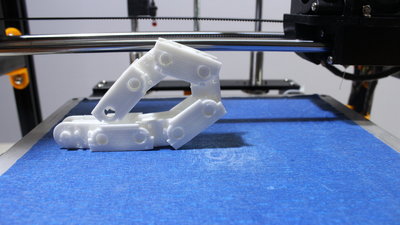
Test print "cable chain" Layer height: 0.2mm Print speed: 40mm/s Material: PLA 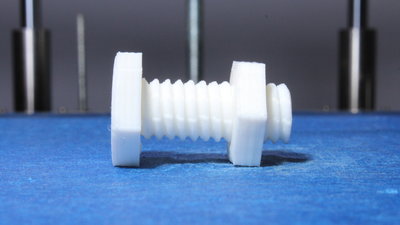
Test print "screw + nut" Layer height: 0.2mm Print speed: 40mm/s Material: PLA Thread height: 30mm <<< Imprint ...to be continued. >>> News The Project Technology RoboSpatium Contribute Subject index Archives Download Responses Games Links Gadgets Contact Imprint |
|
|