|
|
|
|
News The Project Technology RoboSpatium Contribute Subject index Download Responses Games Gadgets Contact <<< Imprint ...to be continued. >>> 3D printer FLSUN QQ-S ProThe video about the FLSUN QQ-S ProGet the Artillery Sidewinder X2 on Geekbuying.com. Special price with Coupon code: NNNFLSUNQQSPRO The printer ships with just a small spool of filament, so add spools of 1.75mm filament to your order. About the printer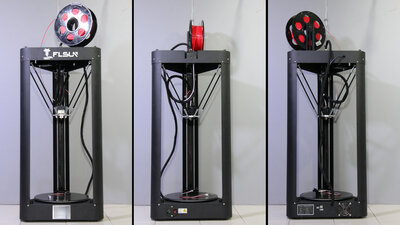
The FLSUN QQ-S Pro is a 3D printer with delta mechanics. It is obvious that the printer, due to its design, is quite high at 101cm including the filament spool, but with a triangular base of 46cm edge length it occupies not much space on your workbench. The big advantage of the delta mechanism is that the print bed is not moved. Instead, only the relatively small mass of the print head is driven. The heavy print bed and the objects to be printed always remain in place. Since only a small mass has to be moved, the stepper motors can be controlled with high acceleration values. Another advantage is that two or even all three motors work at the same time to move the print head in one direction, following the rule: "Together we are stronger". More high resolution photos of the FLSUN QQ-S Pro are available as Download-Paket (44MB!). Mechanics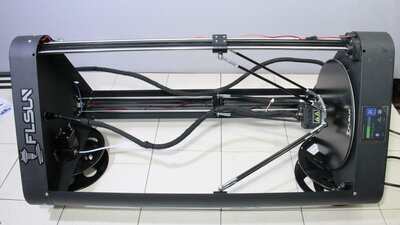
At the edges of the frame there are two parallel rods with a diameter of 8mm. The rods are straight, the illusion of a bend in the photo is only created by the wide-angle lens of my camera. The print head is driven via toothed belts. 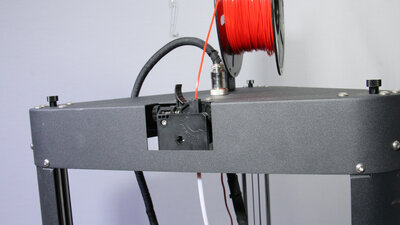
The belt tension can be conveniently adjusted on the pulleys at the top of the frame using knurled nuts. Once that's done, the mechanics run pretty smoothly. The heavy stepper motor of the Bowden extruder is also located on top of the device and therefore does not have to be moved when printing. 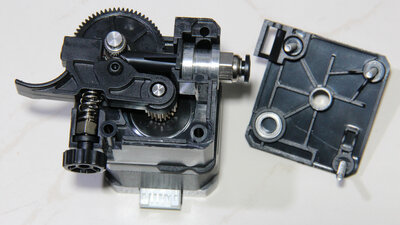
The extruder motor pushes the filament towards the hotend with a gear reduction of 3:1. I was able to print with the QQ-S Pro at up to 120mm/s with a layer thickness of 0.2mm and an extrusion width of 0.7mm without any trouble. 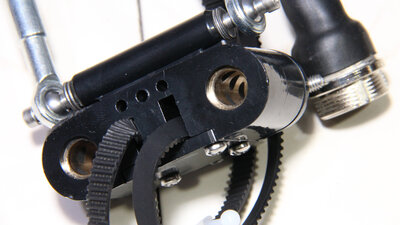
Brass bushings are used to guide the movement along the round rods. My personal opinion on this is: It's better to have good brass bushings (and the ones on the QQ-S are good) than bad linear ball bearings (I've had quite a few of them)! 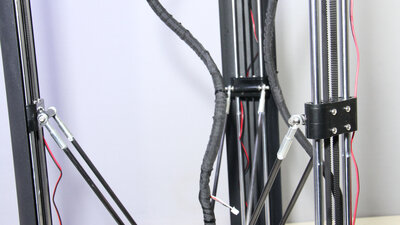
The push rods are connected to the linear guides on the one... 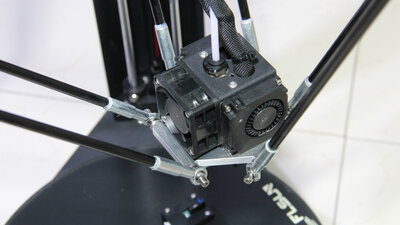
...and to the print head on the other ends. Two parallel push rods per edge are used to prevent the print head from twisting. The system is not completely free of backlash and torsion, but once more, keep the low price in mind. 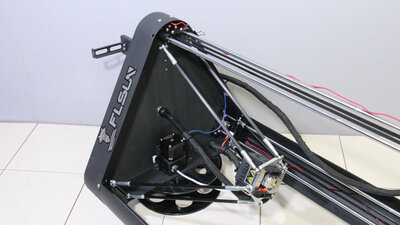
In contrast to conventional printers, the limit switches of a Delta printer are located at the top of the frame. With that, the print head moves up if the homing process is triggered. All three stepper motors start rotating simultaneously and as soon as a limit switch is reached, only the motor in question is stopped until all three limit switches are finally reached. Electronics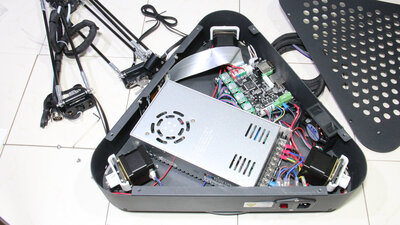
All components are neatly laid inside the base. The power supply delivers an output voltage of 24V at up to 15A, which corresponds to an electrical output of 360W. The three stepper motors moving the print head are also located in the socket. 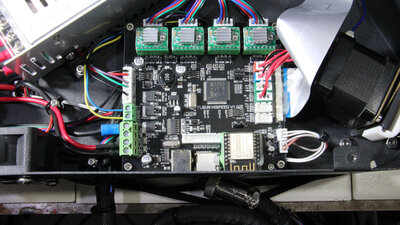
According to the printer menu, the mainboard identifies itself to be a MKS Robin Mini Board and the microprocessor type STM32F runs the Marlin firmware. The stepper motor drivers are plugged into sockets and can therefore be quickly replaced if necessary - that's how I like it! 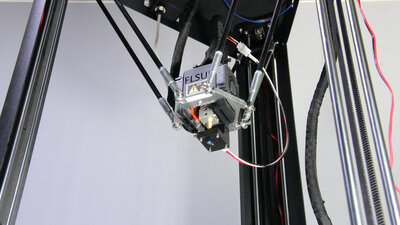
The QQ-S Pro has a sensor for auto-leveling the print bed. This is a mechanical switch, which must be attached to the print head via a magnet before starting the procedure. Furthermore, the cable must be connected to the socket on the print head. 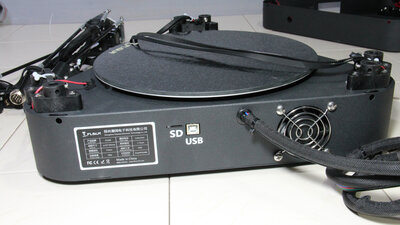
The coated glass plate is glued to the heated print bed, so it cannot be removed. The print bed heating reaches the maximum temperature of 110°C specified by the manufacturer after 10 minutes, whereby the ambient temperature at the time of the measurement was 16°C. Printer cover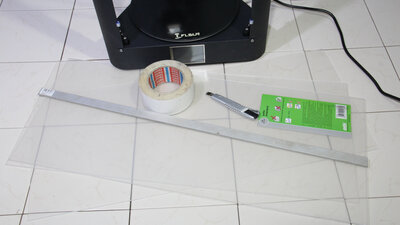
The frame of the QQ-S Pro can be covered very easily, which significantly increases the ambient temperature inside. 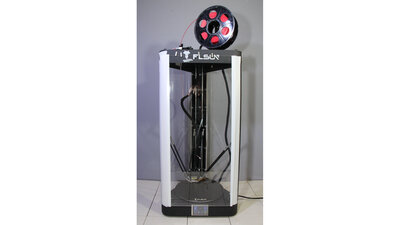
For a quick test, I cut three sheets of 2.5mm Plexiglas and mounted them on the frame with tape. In my video studio, which is only around 14°C cold, the temperature of the Plexiglas cover is between 30 and 40°C at the outside. The wavelength, the infrared thermometer uses for measurement, cannot penetrate the Plexiglas. The build space is warmed-up by the bed heater and to a very small extent by the hotend. In addition to the triangular frame it is very advantageous that all electronic components of the delta printer are outside the heated chamber, including the stepper motors for driving the print head, which are located in the cold base. The QQ-S Pro does not really take up any more space on your workbench with the Plexiglas cover. Sample prints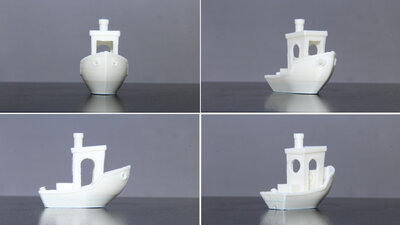
Benchy: Material: PLA Nozzle: 0.4mm Layer height: 0.2mm Dimensions:: 60x31x48mm Definitely not the very best Benchy. The QQ-S does not deliver outstanding, but usable results. It is a fairly inexpensive device with a special mechanism and potential for improvement - a printer for tinkerers like me! 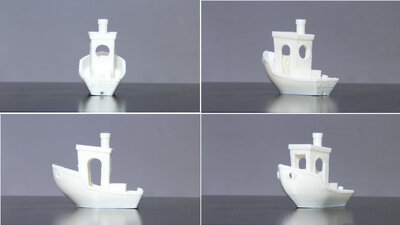
Benchy: Material: PLA Nozzle: 0.4mm Layer height: 0.2mm Dimensions:: 60x31x48mm 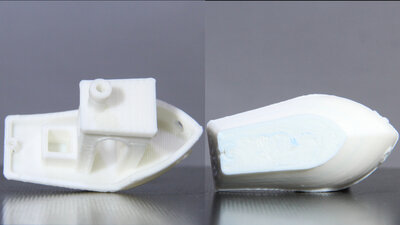
Benchy: Material: PLA Nozzle: 0.4mm Layer height: 0.2mm Dimensions:: 60x31x48mm 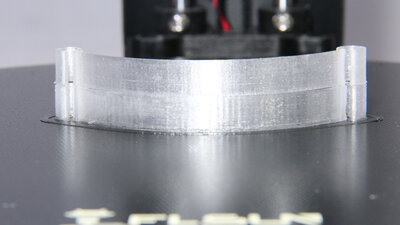
Klemme: Material: PET-G Nozzle: 0.4mm Layer height: 0.2mm Dimensions:: 90x26x10mm The clamps are used to keep the limit switch wires away from the moving parts - an improvement that will surely pay dividends in the long term. The 3D file is available as download. 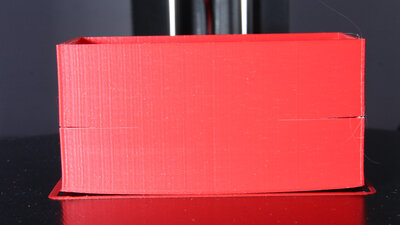
Schachtel: Material: ABS Nozzle: 0.4mm Layer height: 0.2mm Dimensions:: 100x50x50mm If ABS is printed without a frame cover, the box begins to visibly detach from the print bed at a height of 10mm. A horizontal crack later formed, making the print completely unusable. 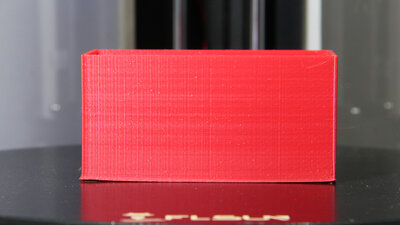
Schachtel: Material: ABS Nozzle: 0.4mm Layer height: 0.2mm Dimensions:: 100x50x50mm Here the same box was printed with the cover. Only slight detachments can be seen at the corners, the print shows significantly less warping. Active heating of the build chamber to reach higher ambitient temperatures should improve the result even more. <<< Imprint ...to be continued. >>> News The Project Technology RoboSpatium Contribute Subject index Archives Download Responses Games Links Gadgets Contact Imprint |
|
|