|
|
|
|
News The Project Technology RoboSpatium Contribute Subject index Download Responses Games Gadgets Contact <<< Imprint ...to be continued. >>> Anycubic Kossel 3D printerThe Video about the Anycubic Kossel 3D DruckerBuy the printer at Gearbest.com Coupon: GBAnycubic1 Only 10m of black PLA filament comes with the kit, thus don't forget to order filament. Assembly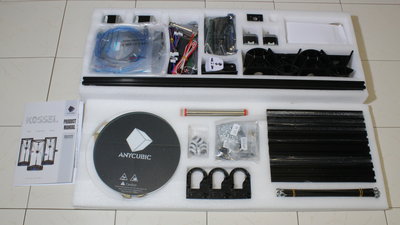
The printer is shipped as a kit. The build instruction comes as print version, in English - even worser than mine. A screwdriver and hexagon tools needed for the assembly are part of the kit. he aluminum bars of the construction are covered with metal chips from the fabrication and you should have a close look if none of them has entered the hotend. 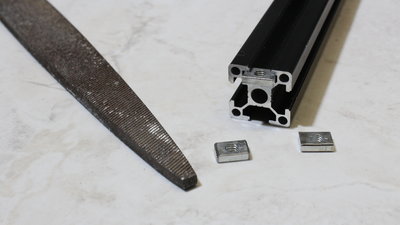
The assembly is a bit fiddly - for example I had to grind the edges of the rectangular nuts used as mount points at the aluminum bars. All in all the fitting accuracy of the parts isn't bad, considering that this is a low cost printer. 
Wiring is done through plugs with reverse polarity protection, only the wires running to the hotend are connected on the mainboard by screw terminals. 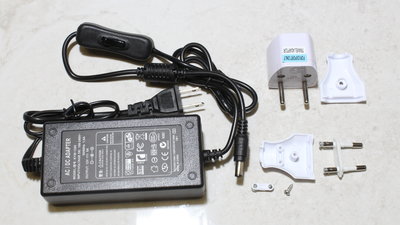
The external power supply has a power switch on the DC side. The adapter at the AC side doesn't fit into German socket outlets. It's no big deal to replace the plug, which is the better solution than any adapter. About the printer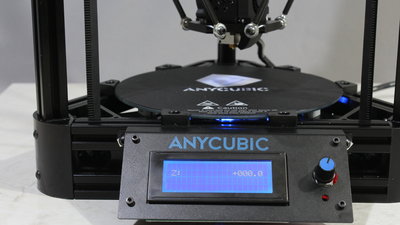
There is a warning on the print bed, however this low cost version of a 3D printer has no heated bed. Furthermore, the print bed is not adjustable, which is why leveling the printer is very time consuming when following the steps of the build instruction. I did it my way: First of all home the linear drives though the printer menu. Now, the print head is commanded down from 300mm to the zero position. Even if it takes a long time to move the print head for those 300mm, you must do the movement stepwise or else the firmware returns to the main screen and the print head doesn't stop when reaching the adjusted hight. When the zero position is reached, there must be a small gap between tip of the nozzle and print bed. Adjust that gap by moving the end switches along the bars - make sure that the distance between end switch and upper edge of the printer is equal for all three switches. Repeat that procedure until no more than a sheet of paper fits between nozzle and print bed. The fine tuning is done with the screws on top of the linear drives. You can also use stripes of paper underneath the print bed to fine tune the printer. Sample prints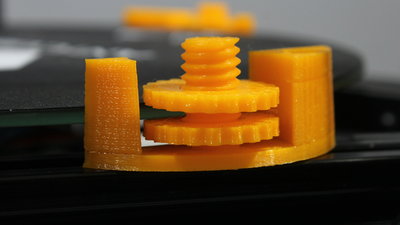
Adjustable print bed mount: The knurled nuts fit on the thread as they come out of the printer - at least after the 3rd iteration of the design parameters: Using zero tolerance between the inner and outer thread was a bit over optimistic... You can get the OpenSCAD and *.stl files as download package. 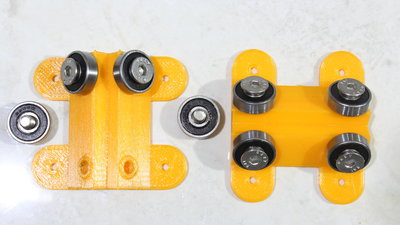
Linear bearing: It's just a rough design using 8 ball bearings (fewer would be cheaper). 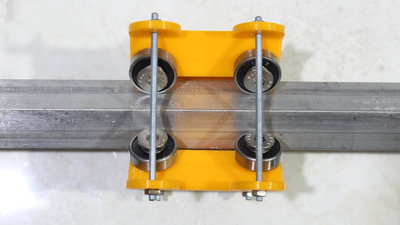
...it works. 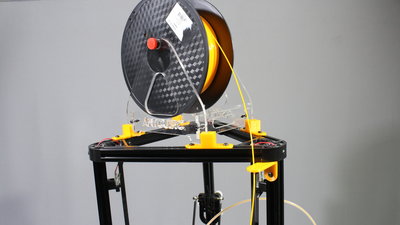
Mounts for the filament spool on top of the printer. You can get the OpenSCAD and *.stl files as download package. <<< Imprint ...to be continued. >>> News The Project Technology RoboSpatium Contribute Subject index Archives Download Responses Games Links Gadgets Contact Imprint |
|
|